
Widgets
Describe a widget, let the AI build it, and put it on any page: a YouTube video, an image slider, scrolling text, an offer bar, a countdown, pricing cards, or your own HTML, CSS and JavaScript.
Open Widgets (under Build). The page shows how many widgets your plan allows and every widget you have made, with its views, clicks and the websites it is on over the last 30 days.
| Plan | Widgets |
|---|---|
| Free (the trial) | 1 |
| Paid plans | 10 |
| Top plans | Unlimited |
Each message to the AI uses 10 AI credits from your monthly allowance. Editing the code yourself, publishing and the numbers cost nothing.
1. Make a widget
- Describe it: type what it should be, for example "A slider of my clinic photos with a Book now button", and choose Build it with AI.
- Or start from a ready-made one: YouTube video, Image slider, Scrolling text, Announcement bar, Countdown, Map or other embed, or Start from scratch.
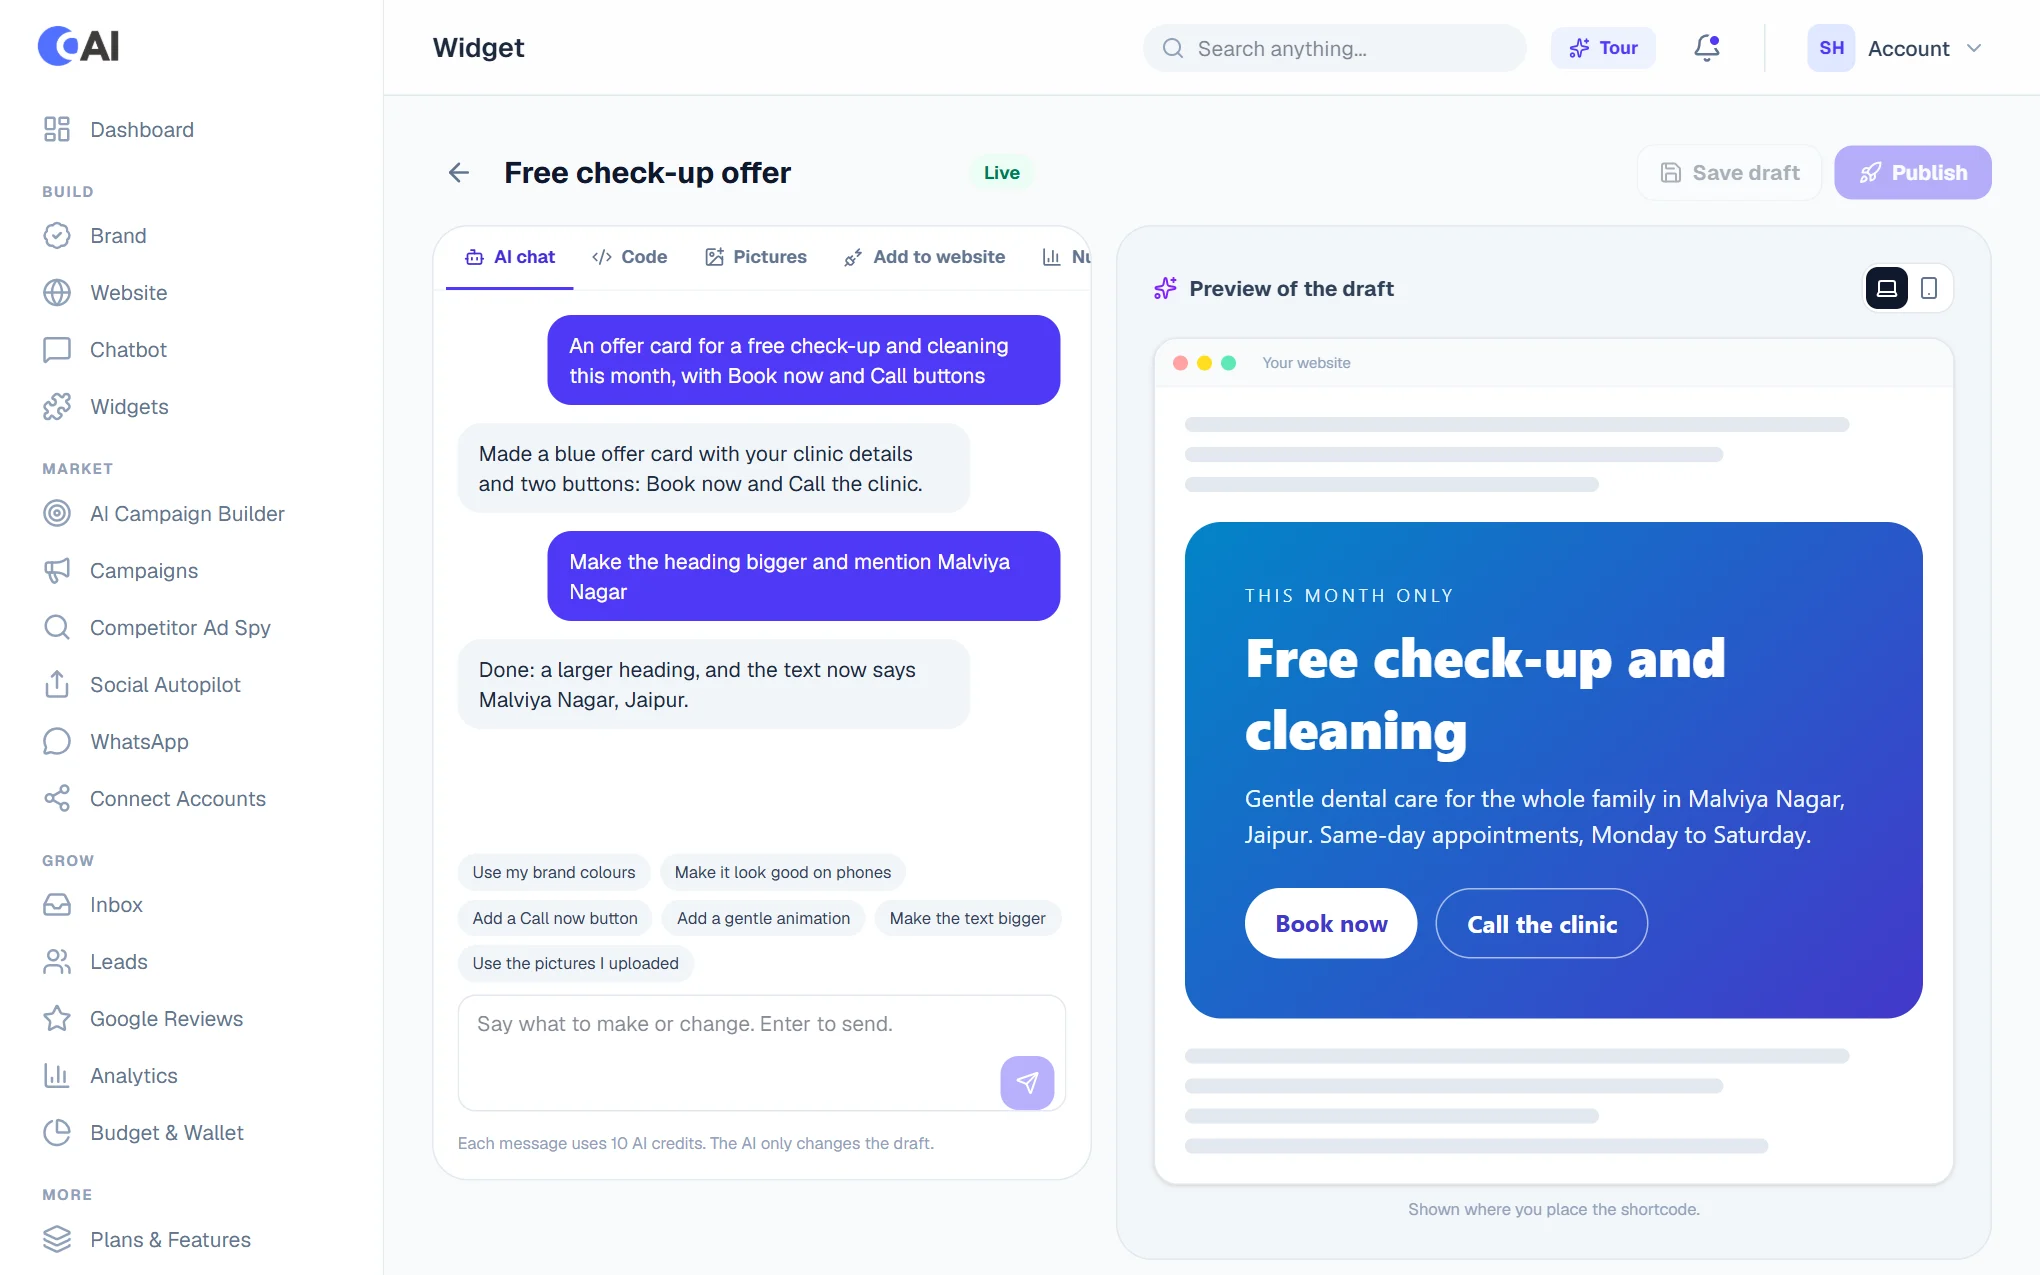
The editor opens. Your tools are on the left; on the right is a live preview of the draft, on a sample page, at desktop or phone size.
2. Change it by chatting
In AI chat, say what to change: "use my brand colours", "add a Call now button", "make it look good on phones", "add a gentle animation". The AI remembers the conversation and rewrites the widget each time. It writes from your Brand Profile and never invents prices, offers or phone numbers: it leaves clear placeholders instead.
Pictures: upload them in the Pictures tab, then ask the AI to use them ("use my pictures in the slider").
3. Or edit the code yourself
The Code tab has the widget's HTML, CSS and JavaScript. Tick Use Tailwind CSS classes to style with Tailwind. The preview updates as you type; choose Save draft to keep your changes.
4. Publish
Everything you or the AI change is a draft: websites keep showing the published version until you choose Publish. Websites pick up a new version within a minute. History keeps every version; Use this puts an earlier one back in the draft.
5. Put it on your website
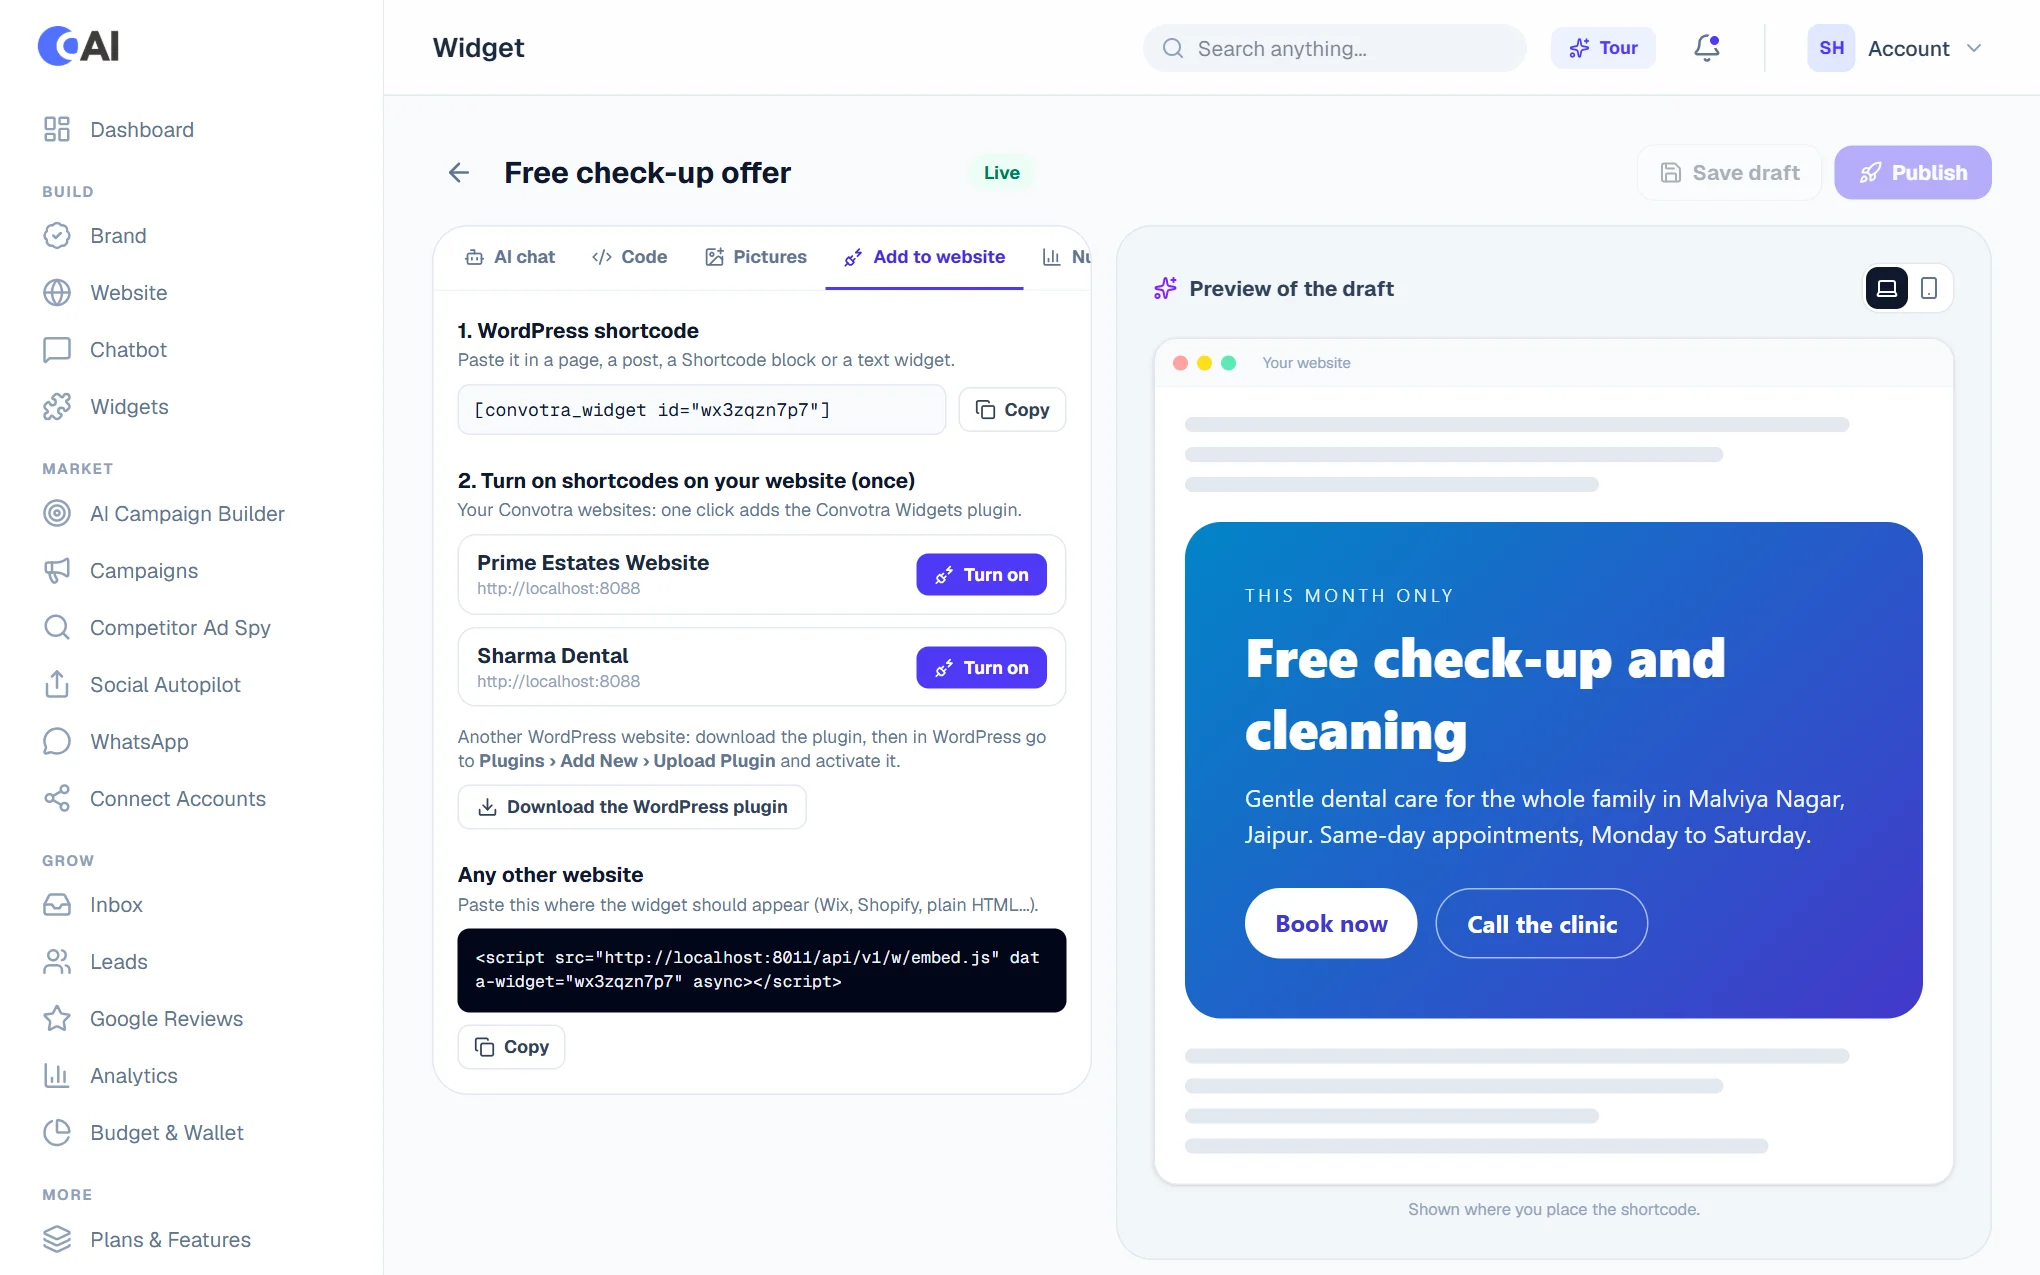
Open Add to website:
- WordPress: copy the shortcode, for example
[convotra_widget id="w7jr475via"], and paste it in a page, a post, a Shortcode block or a text widget. - Turn on shortcodes once per website. For your Convotra websites, choose Turn on next to the site. For another WordPress website, choose Download the WordPress plugin and upload it in WordPress under Plugins › Add New › Upload Plugin, then activate it.
- Any other website (Wix, Shopify, plain HTML): copy the one-line script and paste it where the widget should appear.
In Settings, choose where it sits: where I put it, or a bar fixed to the top or bottom of the page (for offer and notice bars). Pause hides it everywhere without removing the shortcode.
6. See how it does
The Numbers tab shows views and clicks per day for the last 30 days, the share of views that led to a click, and every website the widget was seen on. A visitor seeing the widget again within half a minute counts once.